STEP 3 - Open-up the sealed unit (continued)......
Once the top pane is free from the spacer
bars turn it over so
that the inside face is now on the top.
|

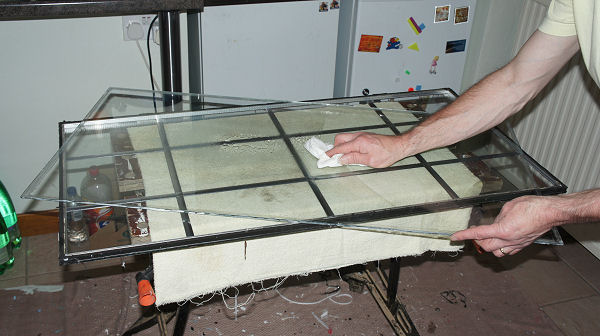
Step 3 cont. - reverse the top pane and
clean-up the edges |
thoroughly clean the glass |
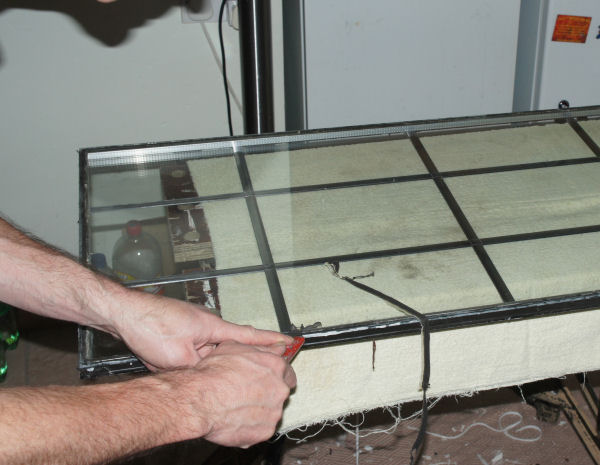
With the sharp Stanley knife remove any
residual sealant from around the pane edge. This doesn't
need to be perfect, but leave the surface as clean as you
can. The pane will bond better later if you have removed all
of the old sealant from the surface. On my units the old
rubber sealant shaved off cleanly if I made sure the blade I
was using was sharp.
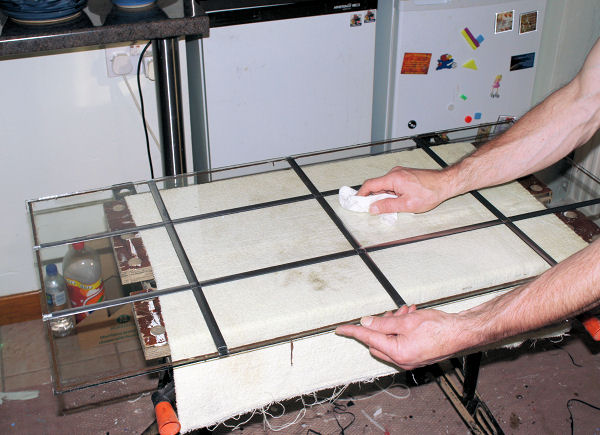
Now thoroughly clean the surface of the
removed pane. This is your first opportunity, but not the
last, to remove any staining on the glass. On all of the
units I have repaired the internal marking on the glass has just cleaned off, but
I imagine there might be some out there that are more
permanently damaged. If they are you should decide now
whether or not to replace the glass pane with a new one.
Stand the cleaned top pane in a safe place
away from your work area until it is needed again later.
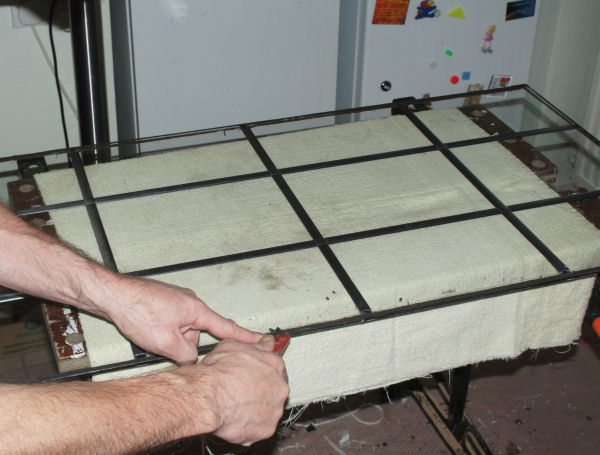
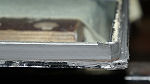
Now remove the bulk of the remaining sealant
on the frame.
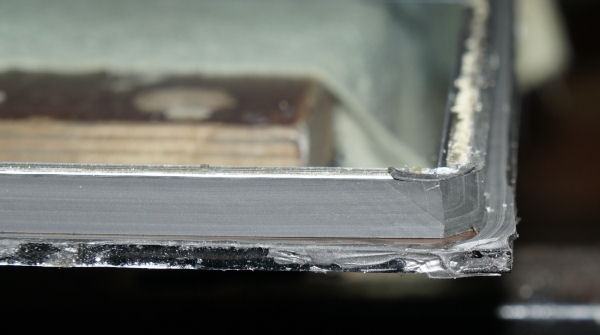
Carefully slice vertically along the outside edge of the
aluminium spacer bars - take care not to cut into the
aluminium.
Then follow this with a horizontal cut along
the top surface of the bottom glass pane. The old sealant
should come away. Do this all around the perimeter of the
unit.
|
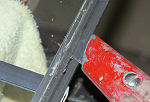
..vertical cut against the
spacer.. |

..slice away the old sealant.. |
 |
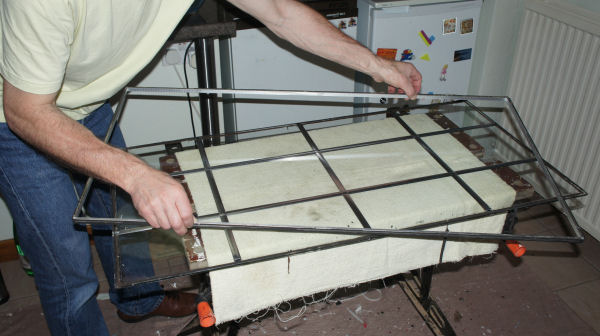
Next cut between the upper surface of the
bottom glass pane and the bottom surface of the spacer bars
to remove the spacer bar frame from the glass.
Do this with several careful shallow cuts
rather than a single deep one - you don't want to damage
either the glass or the spacer bar. On my units the spacers
were only bonded lightly to the glass so this wasn't too
difficult. Don't force anything......you don't want any
breakages.
|
Slice between the spacer and the glass to
remove the spacer |

...lift off the spacer frame and set aside... |
Once you have cut all the way around the
aluminium spacer frame it can be lifted away from the glass
pane - set the frame aside for the moment (put it well away
from your feet - it isn't strong and you really don't want
to stand on it).
All that is left now is the lower glass pane
- with your sharp Stanley knife shave off any remaining
sealant on the glass. Leave the surface as clear as possible
to ge the best bond when you re-seal the unit later.
If there is any sealant or putty on the
bottom surface of the pane remove this also.
Then thoroughly clean both sides of the
remaining pane. You can see on this one that the pane is
leaded - cleaning is easier on unleaded glass. Clean as
thoroughly as you can, then set the pane aside. You can have
another shot later to make sure there are no residual smears
on the glass before the unit is re-sealed.
Next Page - for step 4, refurbishing the
spacer frame.....